 pqaoo
pqaoo
Repotting indoor plants is one of those gardening tasks that looks simple until you actually remove a plant from its pot. The roots can be tightly packed, the soil may fall apart, and sometimes the plant seems stuck. This is where many beginners become worried about damaging the roots.
The good news is that repotting indoor plants does not have to be stressful. With the right preparation and a gentle technique, you can move your plant into a new pot while keeping most of the root system healthy.
I have found that the most important part of repotting is not working quickly. It is taking your time and handling the plant carefully. Healthy roots help an indoor plant absorb water and nutrients, so protecting them should always be a priority.
In this guide, I will explain how to repot indoor plants without damaging the roots, including when to repot, what supplies you need, how to remove a plant safely, and what to do after repotting.
Why Repotting Indoor Plants Is Important
Indoor plants stay in the same container for a long time. Eventually, the roots may fill most of the available space. When this happens, the plant may struggle to absorb enough water and nutrients.
Fresh soil can also become useful because old potting soil gradually loses structure. It may become compacted and hold too much or too little water.
Repotting can give the roots more room to grow and provide fresh growing material. It can also help improve drainage and give the plant better support.
However, repotting should not be done simply because you have a larger pot available. Moving a plant too often can create unnecessary stress.
The goal is to repot when the plant actually needs it.
Signs Your Indoor Plant Needs Repotting
One of the first questions beginners ask is how to know when an indoor plant needs a new pot.
There are several signs to watch for.
Roots Are Growing Out of the Drainage Holes
If you can see roots coming from the bottom of the pot, the plant may have outgrown its container. One or two roots do not always mean immediate repotting is necessary, but a large number of roots can indicate that the plant needs more space.
Water Runs Through Too Quickly
If you water your plant and the water immediately passes through the soil without soaking it properly, the roots may have filled much of the pot.
This can happen when the soil has become very dry and compacted or when the plant has developed a dense root ball.
The Plant Dries Out Very Quickly
If your indoor plant used to stay hydrated for several days but now becomes dry much faster, it may be growing in a pot that has become too small.
Of course, temperature, sunlight, humidity, and the type of plant can also affect how quickly soil dries.
The Plant Has Stopped Growing
Slow growth can have many causes, but a severely root bound plant may not have enough room for healthy root development.
If the plant is receiving suitable light, water, and nutrients but still struggles, checking the roots during repotting may help identify the problem.
The Plant Keeps Falling Over
A plant can become top heavy as it grows. If the container is too small to support the plant, it may keep tipping over.
A slightly larger and heavier pot can provide better stability.
Choose the Right Time to Repot
Timing can make repotting easier.
For many indoor plants, spring and early summer are good periods because plants are entering or experiencing active growth. During active growth, plants generally have a better ability to recover from the disturbance.
That does not mean you can never repot a plant at another time.
If the plant has serious root problems, poor drainage, broken soil, or another urgent issue, waiting for the perfect season may not be the best choice.
I prefer to repot when the plant is healthy enough to handle the change and when I can give it proper aftercare.
Choose the Right Pot Size
Choosing the correct pot size is one of the most important parts of repotting indoor plants.
Many beginners think that a much larger pot is better because the plant will have plenty of room to grow. In reality, an oversized pot can create problems.
A large container holds more soil. More soil can retain moisture for longer, especially when the plant has a relatively small root system. This can increase the risk of overwatering.
For most indoor plants, choose a new pot that is only slightly larger than the current one.
A pot about 2 to 5 centimeters wider than the existing container is often a reasonable starting point, although the ideal size depends on the plant and its root system.
The new container should also have drainage holes.
Prepare Everything Before You Start
Before removing the plant from its old pot, prepare your workspace.
You may need:
- A clean new pot
- Fresh indoor potting mix
- Clean scissors or pruning shears
- A small trowel
- A clean working surface
- Water
- A small amount of support material if the plant is tall
Having everything ready means you will not have to leave the exposed roots sitting around while you search for supplies.
Make sure the new pot is clean. If you are reusing an old container, wash it properly and remove old soil and debris.
Prepare the Plant Before Repotting
A plant that is severely dry can be difficult to remove from its container because the soil may become hard and break apart.
Watering the plant a day before repotting can help the root ball hold together. The soil should be slightly moist rather than completely soaked.
Avoid repotting immediately after heavy watering if the soil is extremely wet. Very wet soil can become heavy and messy, and handling a saturated root ball can make the process more difficult.
Check the plant for obvious problems before starting. If you notice pests or signs of serious disease, it may be better to understand the problem first rather than automatically moving the plant into fresh soil.
How to Remove an Indoor Plant Without Damaging the Roots
This is the part where gentle handling matters most.
First, place one hand around the base of the plant. Support the stems without squeezing them.
Tilt the pot slightly to one side. Instead of pulling hard on the leaves or stems, gently tap the sides and bottom of the container.
For a flexible plastic pot, you can gently squeeze the sides. This can help loosen the soil and root ball.
If the plant still does not come out, do not force it.
Use your fingers or a small tool to loosen the soil around the inside edge of the pot. Work slowly around the container.
Once the root ball begins to move, support it with your hand and carefully slide the plant out.
The key rule is simple.
Never pull aggressively on the stem to remove a plant from its pot.
Strong pulling can damage the roots and may even injure the stem.
Inspect the Roots Carefully
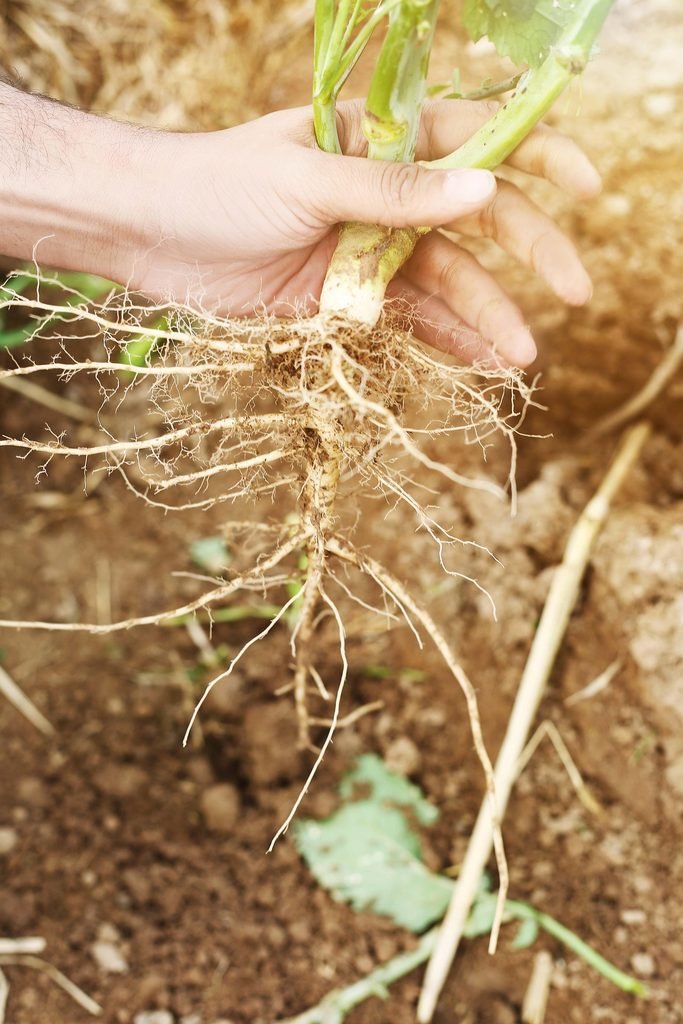
Once the plant is out of the container, take a moment to inspect the roots.
Healthy roots may be white, cream, tan, or light brown depending on the plant species. They should generally feel firm rather than soft and mushy.
If the roots are tightly circling the outside of the root ball, the plant may be root bound.
You do not always need to completely remove the old soil. In fact, aggressive root cleaning can create unnecessary damage.
The amount of soil you remove should depend on the situation.
If the plant is healthy and you are simply moving it into a slightly larger container, disturbing the root ball as little as possible is usually the safer approach.
What to Do With Root Bound Plants
Sometimes the roots have formed a dense mass around the outside of the soil.
In this situation, you can gently loosen the outer roots with your fingers.
Do not aggressively pull apart the entire root ball.
If a few roots are tightly circling the bottom or sides, gently separate them where possible.
For extremely root bound plants, a few small cuts may sometimes be necessary. Use clean and sharp scissors rather than tearing the roots by hand.
However, root pruning should be done carefully and only when appropriate for the plant.
For a normal repotting job, minimal root disturbance is usually the better choice.
Remove Damaged Roots Carefully
During inspection, you may find roots that are black, extremely soft, mushy, or visibly damaged.
These roots can be removed with clean scissors.
Cut back to healthy tissue rather than repeatedly cutting large sections of the root system.
Do not remove healthy roots simply because they look different from what you expected. Root colors can vary between plant species.
If you are uncertain, it is better to be conservative.
The purpose of repotting is to help the plant, not to create a large amount of root disturbance.
Prepare the New Pot
Place some fresh potting mix into the bottom of the new container.
The amount should be enough to position the plant at approximately the same depth as it was growing before.
Avoid placing the plant too deeply.
The base of the stem should not be buried much deeper than before because excessive moisture around the stem can create problems for some plants.
Place the plant in the center of the container and check its height before adding more soil.
Add Fresh Potting Soil
Once the plant is positioned correctly, slowly add fresh potting mix around the root ball.
Use your fingers to guide the soil into open spaces.
You can gently tap the sides of the pot to help the soil settle.
Do not press the soil down extremely hard. Compacting it too much can reduce air spaces around the roots and affect drainage.
The soil should support the plant while still allowing air and water to move through it.
Leave a small amount of space near the top of the pot so that water does not immediately spill over the edge when you water.
Water the Plant After Repotting
After repotting, water the plant according to its normal needs.
Water slowly and evenly until some water begins to drain from the bottom of the container.
This helps settle the fresh potting mix around the roots.
Do not assume that more water will help the plant recover faster.
The roots have already experienced some disturbance, so keeping the soil constantly wet is not a good recovery strategy.
Allow the plant’s specific watering needs and soil conditions to guide your next watering.
Where to Place the Plant After Repotting
A newly repotted plant may need a little time to adjust.
Place it in a suitable location with appropriate light for its species.
Avoid suddenly moving a plant from moderate indoor light into intense direct sunlight immediately after repotting unless that is already its normal environment.
The plant may temporarily show signs of stress.
Some leaves may droop slightly. Growth may also slow down for a short period.
This does not automatically mean that something has gone wrong.
Give the plant stable conditions and avoid making several major changes at once.
Common Repotting Mistakes to Avoid
Knowing what not to do can make repotting indoor plants much safer.
Using a Very Large Pot
A huge container is not necessarily better. Excess soil can remain wet for a long time and create an unsuitable environment for the roots.
Pulling the Plant by the Stem
This is one of the easiest ways to cause unnecessary damage.
Always support the root ball and loosen the container instead of using force.
Removing All the Soil
For a healthy plant, completely cleaning the roots is often unnecessary.
Keeping much of the existing root ball intact can reduce stress.
Breaking Healthy Roots
Do not aggressively separate every root. Some roots will naturally be intertwined.
Only loosen what needs to be loosened.
Using Poor Quality Soil
Indoor plants need a potting mix that matches their growing requirements.
A dense outdoor soil may not be suitable for many container grown houseplants.
Ignoring Drainage
A beautiful decorative pot without drainage can become difficult to manage.
A container with proper drainage allows excess water to leave the root zone.
Fertilizing Too Heavily
Fresh potting mix may already contain nutrients. Immediately adding a large amount of fertilizer is usually unnecessary.
Follow the needs of the plant and the instructions for the potting mix or fertilizer you are using.
How Often Should Indoor Plants Be Repotted?
There is no single schedule that works for every indoor plant.
Fast growing plants may need repotting more frequently than slow growing plants.
The size of the container, plant species, growing conditions, and root development all matter.
Instead of repotting every year automatically, inspect the plant and look for signs that it needs more space or fresh soil.
Some mature indoor plants can remain in the same pot for quite a while when their growing conditions are stable.
Can You Repot an Indoor Plant Without Removing All the Roots?
Yes.
In many cases, you should avoid unnecessary root disturbance.
If the root system is healthy and the plant simply needs a slightly larger pot, you can move the plant with most of its existing root ball intact.
This method can make repotting less stressful because the roots remain protected by the surrounding soil.
Only disturb the roots as much as necessary to solve the reason for repotting.
What If the Roots Break During Repotting?
A few broken roots do not necessarily mean that the plant will die.
Root damage can happen even when you are careful.
The important thing is to avoid causing more damage.
Handle the plant gently, remove only clearly damaged or unhealthy roots, place it in suitable fresh soil, and provide stable growing conditions.
Avoid repeatedly checking the roots after repotting. The plant needs time to establish itself.
How to Make Repotting Easier for Beginners
If you are new to indoor gardening, start with a plant that is easy to handle.
Choose a clean workspace and prepare the new container before touching the plant.
I also recommend taking a few minutes to observe the plant before repotting. Look at the leaves, stems, soil, and drainage holes.
This simple inspection can tell you a lot.
Most importantly, do not rush.
Repotting is not a race. A slow and gentle approach usually creates less stress for both the gardener and the plant.
Final Thoughts
Learning how to repot indoor plants without damaging the roots is mostly about patience and gentle handling.
Choose the right pot size, prepare fresh potting soil, support the plant properly, and avoid pulling the stem. When you remove the plant, try to keep the root ball together and disturb the roots only when necessary.
After repotting, give the plant suitable light, proper watering, and enough time to adjust.
You do not need complicated equipment to repot most indoor plants successfully. A clean pot, suitable soil, a little water, and careful hands are often enough.
The more plants you repot, the more comfortable you will become with the process. Eventually, you will learn to recognize healthy roots, root bound plants, poor soil conditions, and signs that a plant needs more space.
Good repotting is not about changing everything. It is about giving the roots the support they need while causing as little unnecessary disturbance as possible.